LoudAI


당신의 아이디어를 Loud하게!
세상의 변화를 만들어 가세요
LoudAI는 생성형 AI의 혁신을 통해 비즈니스 가능성을 확장하고,
모든 기업이 AI의 혜택을 누릴 수 있도록 합니다.
우리는 AI를 통해 복잡한 문제를 간소화하고,
혁신적인 솔루션을 제공하여 고객의 성공을 지원합니다.


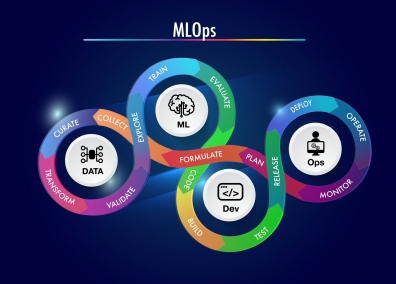
Loud AI Solutions 
LoudAI의 솔루션은 최신 AI 기술을 활용하여 사용자에게 맞춤형 경험을 제공합니다
사용자는 직관적인 인터페이스를 통해 손쉽게 솔루션을 설정하고 활용할 수 있습니다
우리의 플랫폼은 다양한 산업에 적용 가능하여 효율성을 극대화합니다
LoudGen, LoudDoc, LoudML 솔루션을 내부망에 도입하고자 하지만,
최적의 환경을 갖추지 못한 기업들을 위해 하드웨어(HW)와 미들웨어(MW)를
모두 제공하는 온디맨드 솔루션

준비중입니다.
LoudAI의 Lake 모델은 데이터베이스와 연결해 실시간 쿼리와
분석을 가능하게 하여 비즈니스에 필요한 모든 정보를 손쉽게 제공합니다.
또한 Loud AI에서 연구한 로컬모델은 보안걱정 없이 기업 내부에서 사용할 수 있습니다.

LoudLake
LoudAI에서 연구한 sLM으로 기업용 DB와
직접 연결하여 사용할 수 있는 모델

LoudGen
LoudAI가 연구한 전문 보고서 생성용 로컬 모델

LoudNext
LoudAI의 에이전트 구성을 위한 연구 모델

LoudLake
LoudAI에서 연구한 sLM으로 기업용 DB와
직접 연결하여 사용할 수 있는 모델

LoudGen
LoudAI가 연구한 전문 보고서 생성용 로컬 모델

LoudNext
LoudAI의 에이전트 구성을 위한 연구 모델
세계 유수 기업들이
선택한 솔루션

고객 추천사 
우리의 솔루션은 비즈니스를 혁신합니다
-
D의료업 D사★★★★★
LoudAI의 맞춤형 솔루션으로 생산성이 증가했습니다.
-
M교육업 M사★★★★★
디지털교과서 발행에 맞춰 AI 솔루션을 도입 할 수 있도록 도움을 받았습니다.
-
H마케팅 H사★★★★★
매출과 고객 관리를 위한 LLM 도입으로 CRM 업무의 자동화로 생산성이 증가하는 효과를 거뒀습니다.
-
N공공 N기관★★★★★
LoudGen으로 각종 보고서와 사업계획서를 만들었어요.
-
P제조업 P사★★★★★
어떤 AI를 도입해야 할 지 몰랐는데 상담도 자세히 해주시고, 사내 평가에 큰 도움이 되었습니다.
-
B공기업 B기관★★★★★
LoudGen을 도입하여 운영 자동화와 각종 정비 보고서 생성에 활용하고 있어요.
-
S에너지 S사★★★★★
에너지 모니터링 시스템에 LoudAI의 솔루션으로 특정 데이터 검색과 보고서 생성이 편리합니다.
-
M쇼핑몰 M사★★★★★
디지털 마케팅에 LoudAI의 생성 AI를 도입하여 고객 관리와 타켓마케팅이 쉬워졌어요.
연락 주세요 
AI 도입과 협업을 원하시면 저희에게 언제든지 연락해 주세요!


